They call it "First Cut Fever". Gotta "break dat fever". After you cut a piece of wood, it is hard to "re-cut" it. You know the saying. . . "Measure twice, cut once." I started "low pressure". Two molds (#2 and #3) that will be used to form the boat, but will not be part of the boat. This means I can use cheap chip board from the box store instead of $100-a-sheet marine ply from the lumber yard. (FYI: You can click on individual pictures to enlarge and see full frame.)


My next step was to build a carriage so that I could move the project around the garage and even out into the drive way. I used 2" x 6" boards with 2" x 4" braces to build a 4' x 16' carriage with 6 braking whiles rated at 250# each.


I marked the station lines and placement of the ribs. When I marked the Center Line, I noticed that the frame was warped! So I used a string to mark a TRUE Center Line.


I mounted molds #2 and #3 to the strong back.


Double checking my work the next day I noticed that Mold #2 was not aligned properly. I took the time to reattach it fair.


9/11/2020

Using a batten. Cutting the bulkheads out of $100-a-sheet plywood. Using a jig for the limber holes. Perforating the inner cuts.


Laminating the Stem. Seven layers of 1/2" marine ply, making it 3 1/2 inches thick. The leading edge will be bevelled to 2". This is the structural bow of the boat.


My first order of epoxy has arrived, many thanks to CABBS (Cleveland Amateur Boatbuilders and Boating Society). I decided to go with System Three products. Easy mix ratio. Products are designed specifically for boat building. The company has Cleveland roots.

A Ham friend (KE8HNK, Elmer) passed along a jointer that had been passed along to him. This made it easy to bevel the framing for the transom. I ran out of clamps, but had plenty of heavy tool boxes.


Leveled out the front and back edges of the stem. I need to bevel the front edge down to 2" with a band saw.

All of the bulkheads, frames, molds, and transom are mounted to the strong-back/carriage. I will double check all measurements, center-line, and levels before starting to add the side panels.


Thanks to my buddy Daniel, my garage furnace that I have never used is functional. Needed rewiring and a few other tweaks. If you are in Akron and need a HVAC guy, shoot me a message and I will forward his number. Now I can work all winter! :-)
My first attempt at scarfing plywood. Not bad for a novice, I think. This 4' x 15'6" sheet will become most of the bottom. Need to add another 4' or so. I will cut this bow to stern and then scarf an additional piece on the aft end.
My first attempt at scarfing plywood. Not bad for a novice, I think. This 4' x 15'6" sheet will become most of the bottom. Need to add another 4' or so. I will cut this bow to stern and then scarf an additional piece on the aft end.


The band saw would bind up when I tried to bevel the stem, so I cut it free hand with a circular saw. Got it pretty close to where I w ant it. I put a belt sander to the bevels after these pics.


I scarfed a long batten together to check the bottom curve. Looks good except for mold #3. Miscalculated by about a quarter inch. I will scooch that up a bit before I finish cutting the bottom.


Taking advantage of some mild weather in December, I parked the car in the drive way and cut some plywood. First up is the bottom, cut from the scarfed plywood sheets shown above and a a piece for the bow, yet to be attached.


Side panels cut, fore, center, and aft. Had to account for the 6" scarfs when measuring for cuts. Cut around the bad edges. Easy to tell when you missed a measurement. LOL.


Laminating the centerboard. Added some DNA. lol. Centerboard box panels also cut. A Ham Radio friend of mine, Jim (WB8VMW) gave me a bunch of lead weights that were just over 1/4" thick. I cut a square in the center ply and sanded out an extra layer from the inside of the outer plies. I used some System Three "GelMagic" to secure the lead pieces in place (warming with the heat gun) and DAP Weldwood Plastic Resin Glue between the plies. Next up for the centerboard is to shape the foil.


Coldest weekend of the winter so far. Added a foil shape to the center board. Used a round over bit in a router to start the leading edge, then shoe-shined with some sand paper. Used an electric hand planer and belt sander to fin the trailing edge. Finished off the bottom with the belt sander and sanding block. I'll do some touch up right before I glass it.


Using System Three Gel Magic I scarfed the plywood pieces to make the bottom and topsides. Covered the scarf with a piece of fiberglass and some System Three epoxy.


Next was to fit the topsides and the bottom to the strong back. Some para chord helped keep things in place. Used System Three Gel Magic, as it has the consistency of toy Slime, and will stick to a vertical surface. Secured with a couple of #17 stainless fasteners.


Final shaping and fitting of the bow stem. I used Gorilla Tape to hold the topsides together and then clamped the bow stem to the Gorilla Tape.


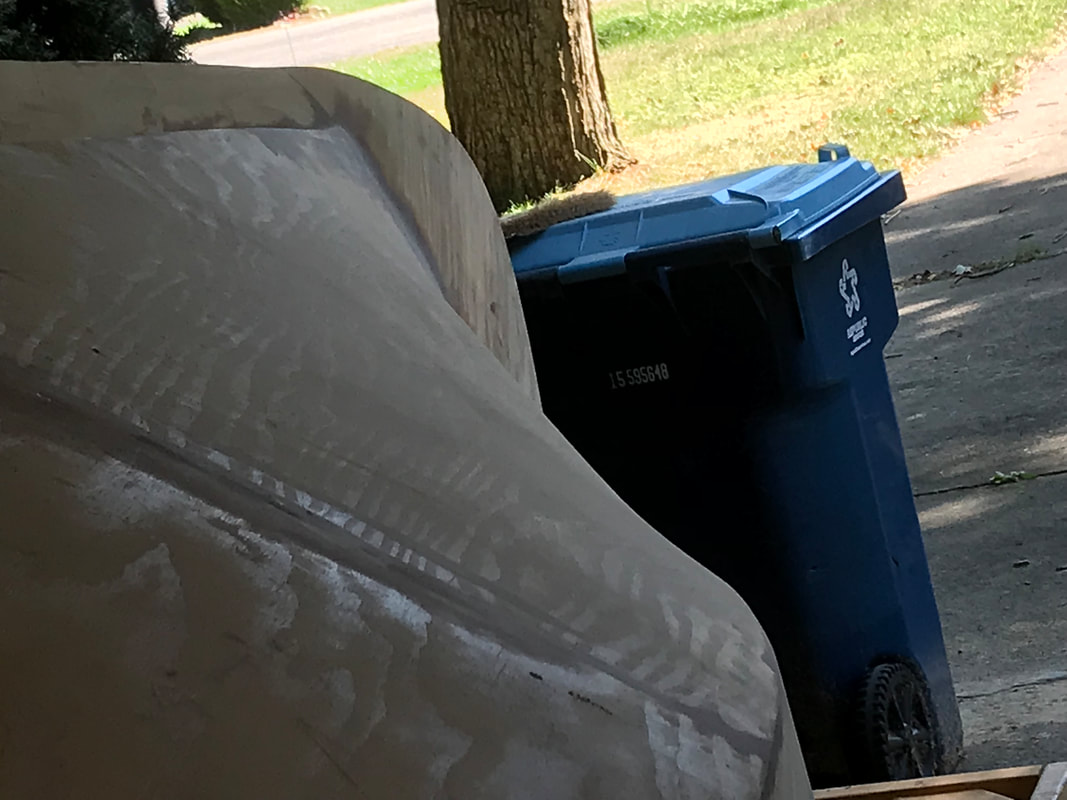
Taking her out for a little sun and to sweep out the east side of the garage.


Building and installing the centerboard box.


Building and installing the hollow keel. The aft keel takes on water as ballast.


There are no patterns for the bilge panels in the plans. These are made from the boat in progress. I made patterns out of stiff cardboard (scrap from the hardware store) to make the patterns.


Then onto doing it in wood and epoxy. The fore panels are laminated 1/4" ply. The three pieces are scarfed together with System Three GelMagic. Now I just have to hope they fit.


I am sure that this is one of the weirdest parts of the build. I did NOT follow what others did. Looking at the Dynamite Payson book, the front panel is attached and butt joint to the rest. I built out the entire panel before attaching so I could make a scarf joint. I read recommendations to laminate two 1/4" sheets for the front sections, but I saw no way to clamp them and no way to scarf the joint.. 1/4" ply is much more flexible than 1/2" and I think 1/2" ply is more flexible than two sheets of 1/4" ply laminated. Lessons learned! It took over three weeks to attach the bilge panels. I tried attaching one panel at a time, but it started to warp the frame, When I releases the ratchet straps, the epoxy fillet unzipped and was repaired with GelMagic.


Now it is time to shape and fair the chines, the edges where the panels come together. I'm just following the natural curve of the bent wood. It never pays to argue with physics.


The bow is made from 5 laminated pieces of 1/2" ply and is attached with EZ-Fillet and a half dozen 3 1/2" stainless lag screws.


Sculpting the hull is much like piano tuning and many other endeavors.... iterative refinement. I believe I did at least 4 iterations of "fill & sand". Probably 5 or 6 in some places. Now to plan out the fiberglassing.


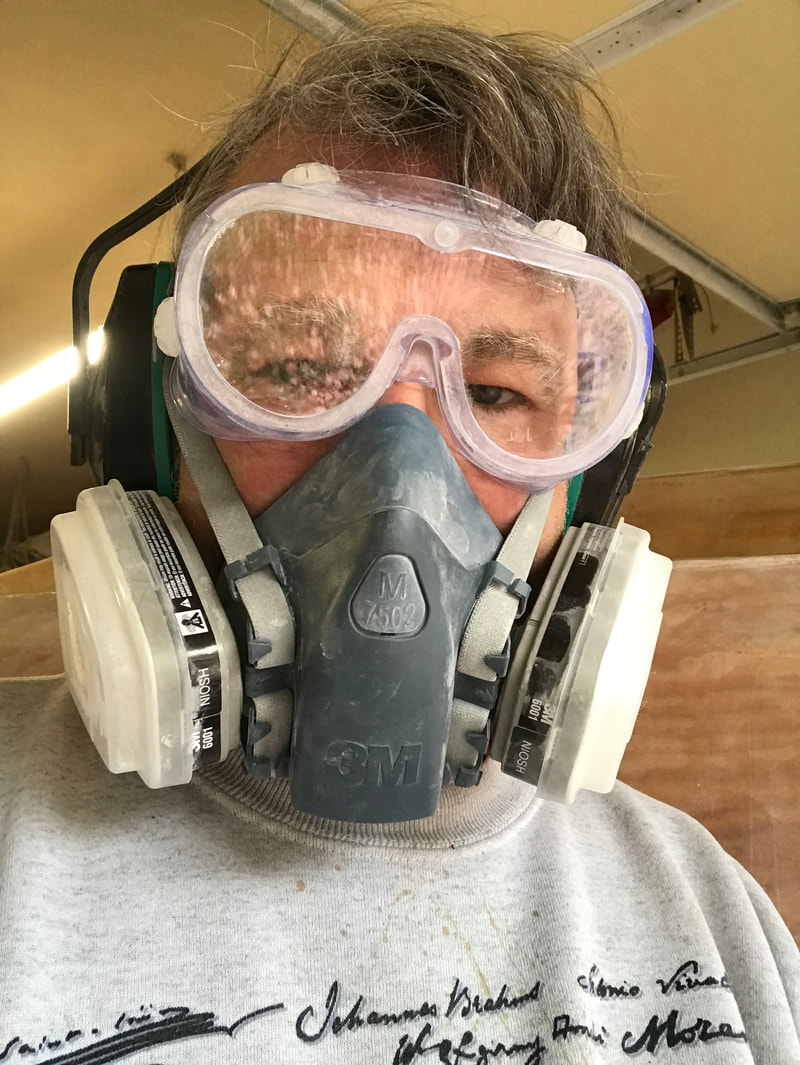
Well, from here it took a month to cover with fiberglass and epoxy. Lot's of hard lessons learned. Of course, precut all of your cloth. I tried pre-coating with epoxy before laying the cloth. That makes it too hard to move the cloth and get the wrinkles out. I actually filled in some spots with loose fiber. It took two full days to lay the cloth. After that, each coat of epoxy to a day to apply and two days to sand. There are five coats of epoxy including the first layer with fiberglass. There is no need to use 10oz cloth for the seams. It does not take curves well and you have to wet the underside before applying, or it will not wet out properly. 6oz would be plenty heavy enough. Don't keep your tipping brush in lacquer thinner. The runs will not sit on top, they will get down into the previous coat. Don't skimp on the sandpaper. It's worth it to use fresh pads. If you are not sensitive to epoxy when you start, you will be by the time you are done. Wear a respirator, goggles, and cover your skin.


Using a plumb bob, a laser level, string, a camera tripod, a ladder, clamps, and a pencil, my Ham buddy Gary, AA8CS, and I marked out the water line. I must say, it looks pretty level. Masked the hull with paper and getting ready to apply ant-fouling bottom paint.


Three coats of anti-fouling bottom paint below the water line. The line looks pretty straight. I hope that is where the water sits.


Three coats of System Three Top Coat. It is green, but there is a strong blue component as well that seems to come out in the sunlight. It is worth it to get the 3/16" Mohair rollers. I don't intend to sand it, but I think I may take a buffing wheel to it.


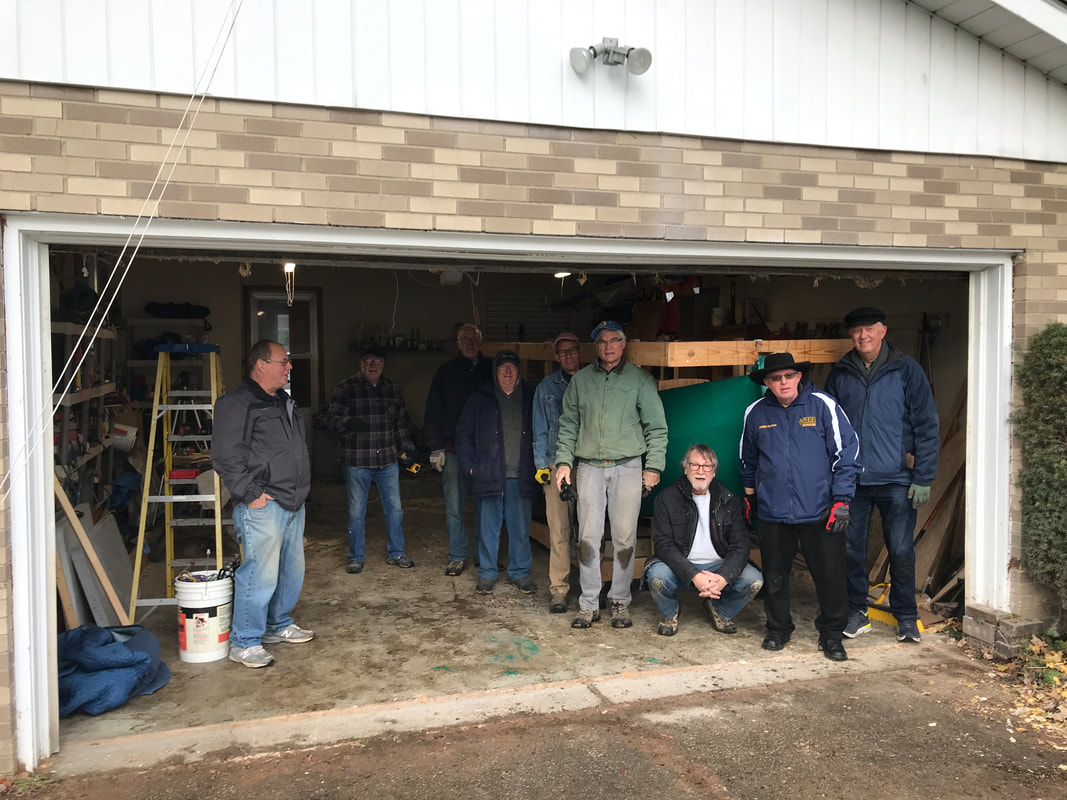
11/28/21. Boat flipping day. We did it! We rolled her over, in the snow, and got her level back on the carriage. I am so terribly grateful to members of the Cleveland Amateur Boatbuilding and Boating Society and the Silvercreek Amateur Radio Association for helping me get the accomplished today. Nobody lost a toe or a fingertip. In fact, no injuries at all. Had a BBQ afterward. I am very anxious to start working on the interior.


We broke off the two middle wheels getting the carriage back into the garage. So I bought two more. Now there are 8 wheels under the carriage instead of 6.


Next was the disassembly of the strong back.


Cutting out perforations in bulkheads, frames and transom, except for the cabin hatch.


My Mom passed on 12/23/2021. It took until April for me to start building again.
Reinforcing the bow with some fiberglass.

Building the toe to hold the mast.


Making a hole in the bottom for the rudder post.


Making the rudder box.


Framing in the seats.


Aft deck wells/quarter panels.


Making the carlyns to support in inner deck and cabin sides. Ripped some 1x2's in half. Scarfed a few. Added spacers in between. Got easy bends in two directions, plus strength.


Mocking decks and seat backs out of cardboard and particle board before cutting the plywood.


Cutting out the decks worked best by cutting three times, once in cardboard, once in 1/4" particle board, and finally in 1/2" ply.


I spent a couple of hours at Hartville Hardware to pick out a wood for the interior trim. I chose Padauka, a beautiful orange-red hardwood (extremely hard) form Africa. It has a wonderfully distinct aroma when cutting or sanding. My first job was to make the cabin rafters.


The Paduka wood is very strong along the grain, but very brittle across the grain. it broke in my bare hands. So I remade the rafters in oak.

Got the cabin side attached to the rafters and then the front of the cabin made out of 7 layers of 1/2" ply. I added framing for the cabin hatch before attaching the cabin roof.


I glassed the cabin floor and the rudder.


I fabricated the cabin roof our of overlapped pieces of 1/4" marine ply. I attached the port side first. My daughter helped me to wrap the starboard side. Then I cut the cabin hatch.


Framed the cabin hatch (sides and front). Cut the hole in cabin roof for mast. Lines up pretty well.


Trimmed the bow stem to size. Kind of a minor milestone.


It took about a week to lay fiberglass on the exterior topside.


As Dori said in "Finding Nemo", sort of..."Just keep sanding... keep sanding...keep sanding. Just keep sanding... keep sanding...keep sanding."


The cabin roof between the hatch rails was an obvious water trap, so I cot some drainage. Put a new skirt on the hull to get ready of for the next coat of expoxy,


Added two more coats of epoxy. Next comes another round of sanding and prepping the interior of the cabin. This will all get two coats of white topcoat.


The topside white took three coats to make me happy, at 4 hours+ per coat. Primer would have helped. Mohair rollers are a necessity.


Using some cut outs to start figuring out the hatch covers.


Painted the centerboard and rudder.


Manufacturing the mizzen/rudder step out of two laminated layers of 3/4" oak.. I used the plug from the hole saw to make a sanding dremel to get rudder post to twist without friction.


Got some new materials. The rub rails are from Plasteak, they are located within walking distance of my home. The 16'x4"x4" and the milled/sanded 4x4's are from Keim Lumber in Charm, OH.


Shaping the spars. I am using solid Douglas fir beams milled to maximum diameter. The boom is "oblong" with no taper. The Gaff is tapered at the peak. I'm planing to octagonal and will later decide what to make round and what to just soften the edges.


Once I found someone to manufacture an aluminum tabernacle, I cut the main mast to length. This gave me an idea of how far the tung oil penetrated into the wood. This is four coats. I will let it cure for a couple of weeks and then add two or three more.

Added oak moulding to the cockpit seats and a Plasteak run rail. The brass and stainless fasteners are spaced 6". The mast collar is not yet affixed.


Making the tack and jaws for the boom and gaff. Added reefing cleats to the boom.


Epoxied the motor mount and mizzen step to the transom. Added 3/8" through bolts to reinforce the engine mount.


I found these brackets at a Ham radio flea market (a Hamfest). They fit almost perfectly and will make a great attachment fora bow cleat for a trailer strap. They are attached with a bolt through the bow stem. The hole is reinforced with aluminum tubing.


Making the bow cleat. 4 plies of oak.


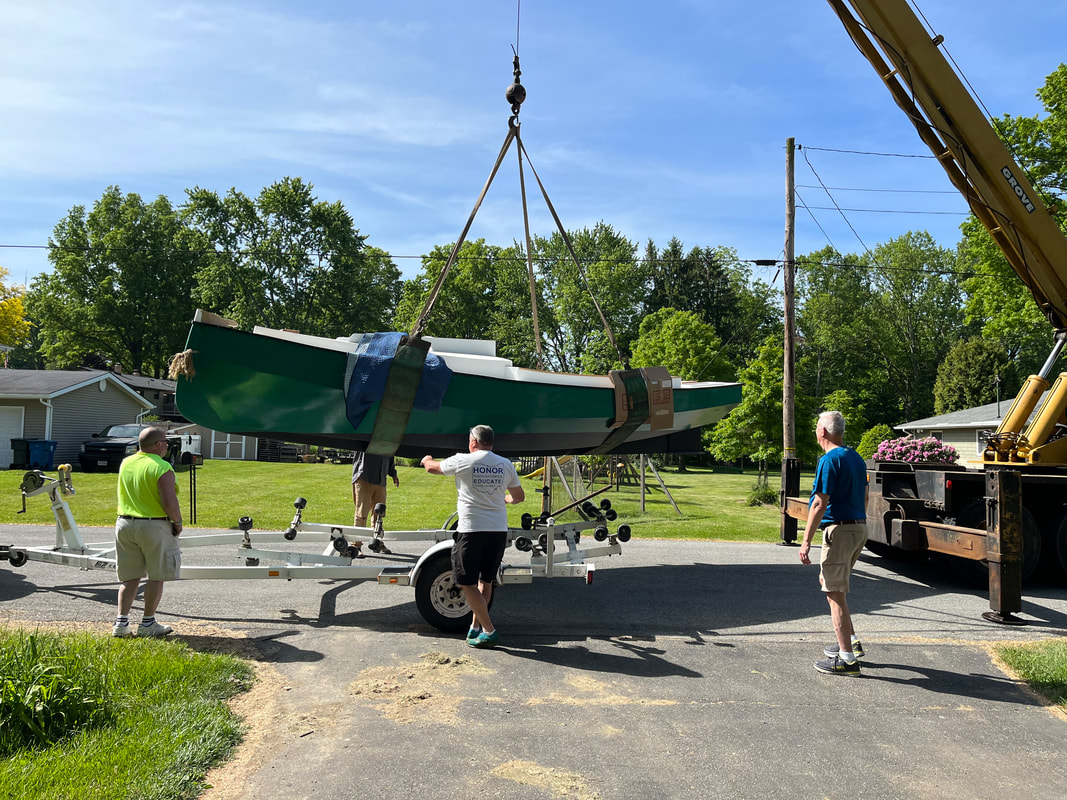
With the help of friends from the CABBS boat building club, the SARA Ham radio club, and Bud (Miller's Crane Service), Meyg got situated on her trailer today.


Tiller/Rudder assembly is complete and added some deck cleats. A buddy of mine made the rudder pintle.


My buddy Lane is manufacturing the steel tabernacle.


Getting rigged and ready to trailer and sail.